2️⃣ | Create Azure Content Safety
To complete this lesson, you would need a Azure OpenAI and Azure AI Content Safety. If you don't have OpenAI in your subscription, you'll only be creating an Azure AI Content Safety resource.
- At the commmand prompt, set the python environment to Python 3.8
conda activate py38_env
- Authenticate to Azure by running the following command:
az login --use-device-code
Enter the code provided in the browser to authenticate to Azure.
- Once authenticated, you need to set your Azure subscription.
az account set --subscription <your-subscription-id>
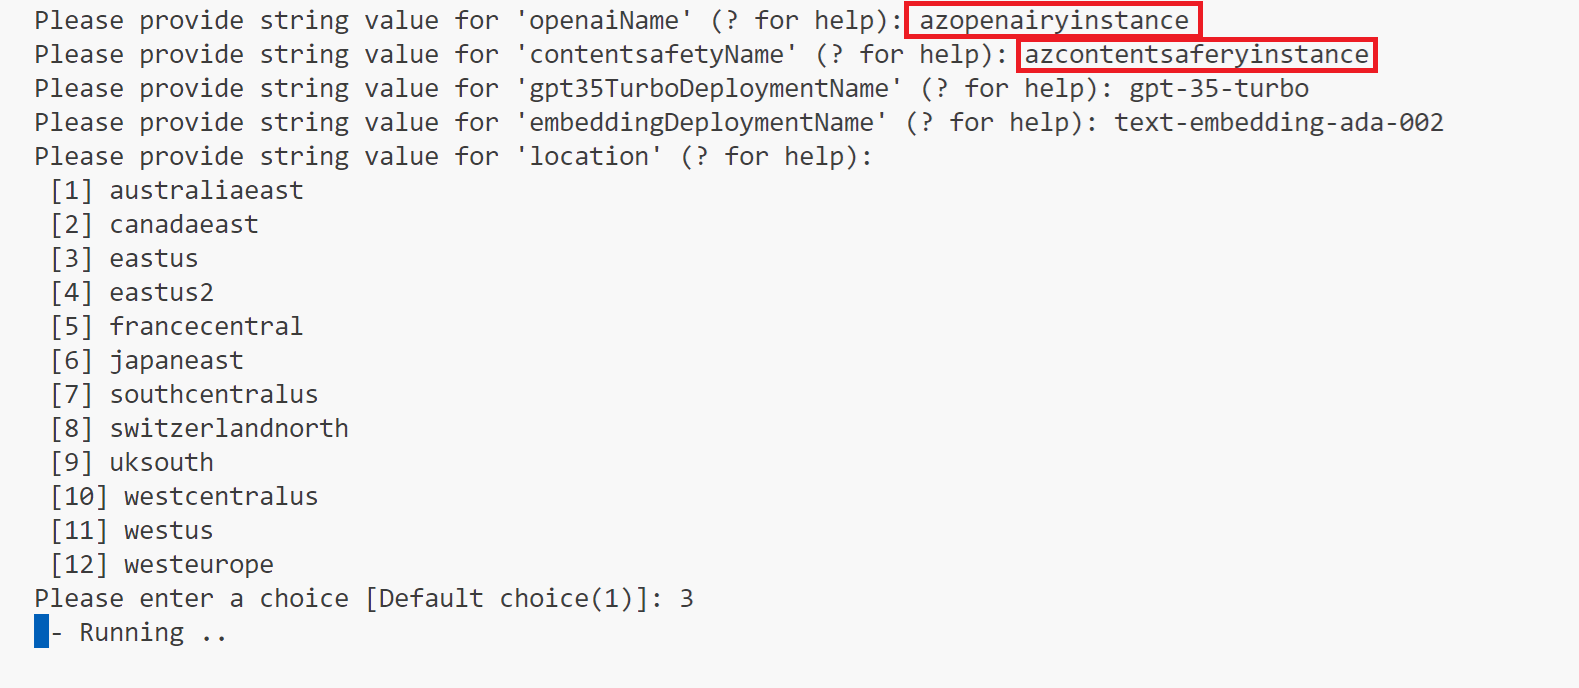
If you have Azure OpenAI enabled in your Azure subscription, pick a location name close to you that GPT-3.5-Turbo model is available: australiaeast, canadaeast, eastus, eastus2, francecentral, japaneast, southcentralus, switzerlandnorth, uksouth, westcentralus, westus, and westeurope.
Otherwise, use a general Azure location lookup by running this script az account list-locations --query "[*].name" --out tsv | sort
- Create a resource group in the region closest to you.
az group create --name <resource-group-name> --location <region-name>
- Set the resource group as the default resource group for the Azure CLI.
az configure --defaults group=<resource-group-name>
- If you HAVE Azure OpenAI available in your subscription, run the following command to create your Azure OpenAI and Azure content safety resources:
az deployment group create --name rai-workshop --template-file use-openai/main.bicep
NOTE: Use only lowercase letters (8 - 20 characters long) for the Azure OpenAI or Azure Content Safety and . DO NOT use numbers or special characters. Use unique names to make sure the name does not match another instance name. Here's an example:
Otherwise, if you DO NOT HAVE Azure OpenAI available in your subscription, run the following command to create your Azure content safety resources:
az deployment group create --name rai-workshop --template-file no-openai/main.bicep
- See the environment variables for your resources.
bash setenv.sh