Introduction
Azure AI Foundry Architecture
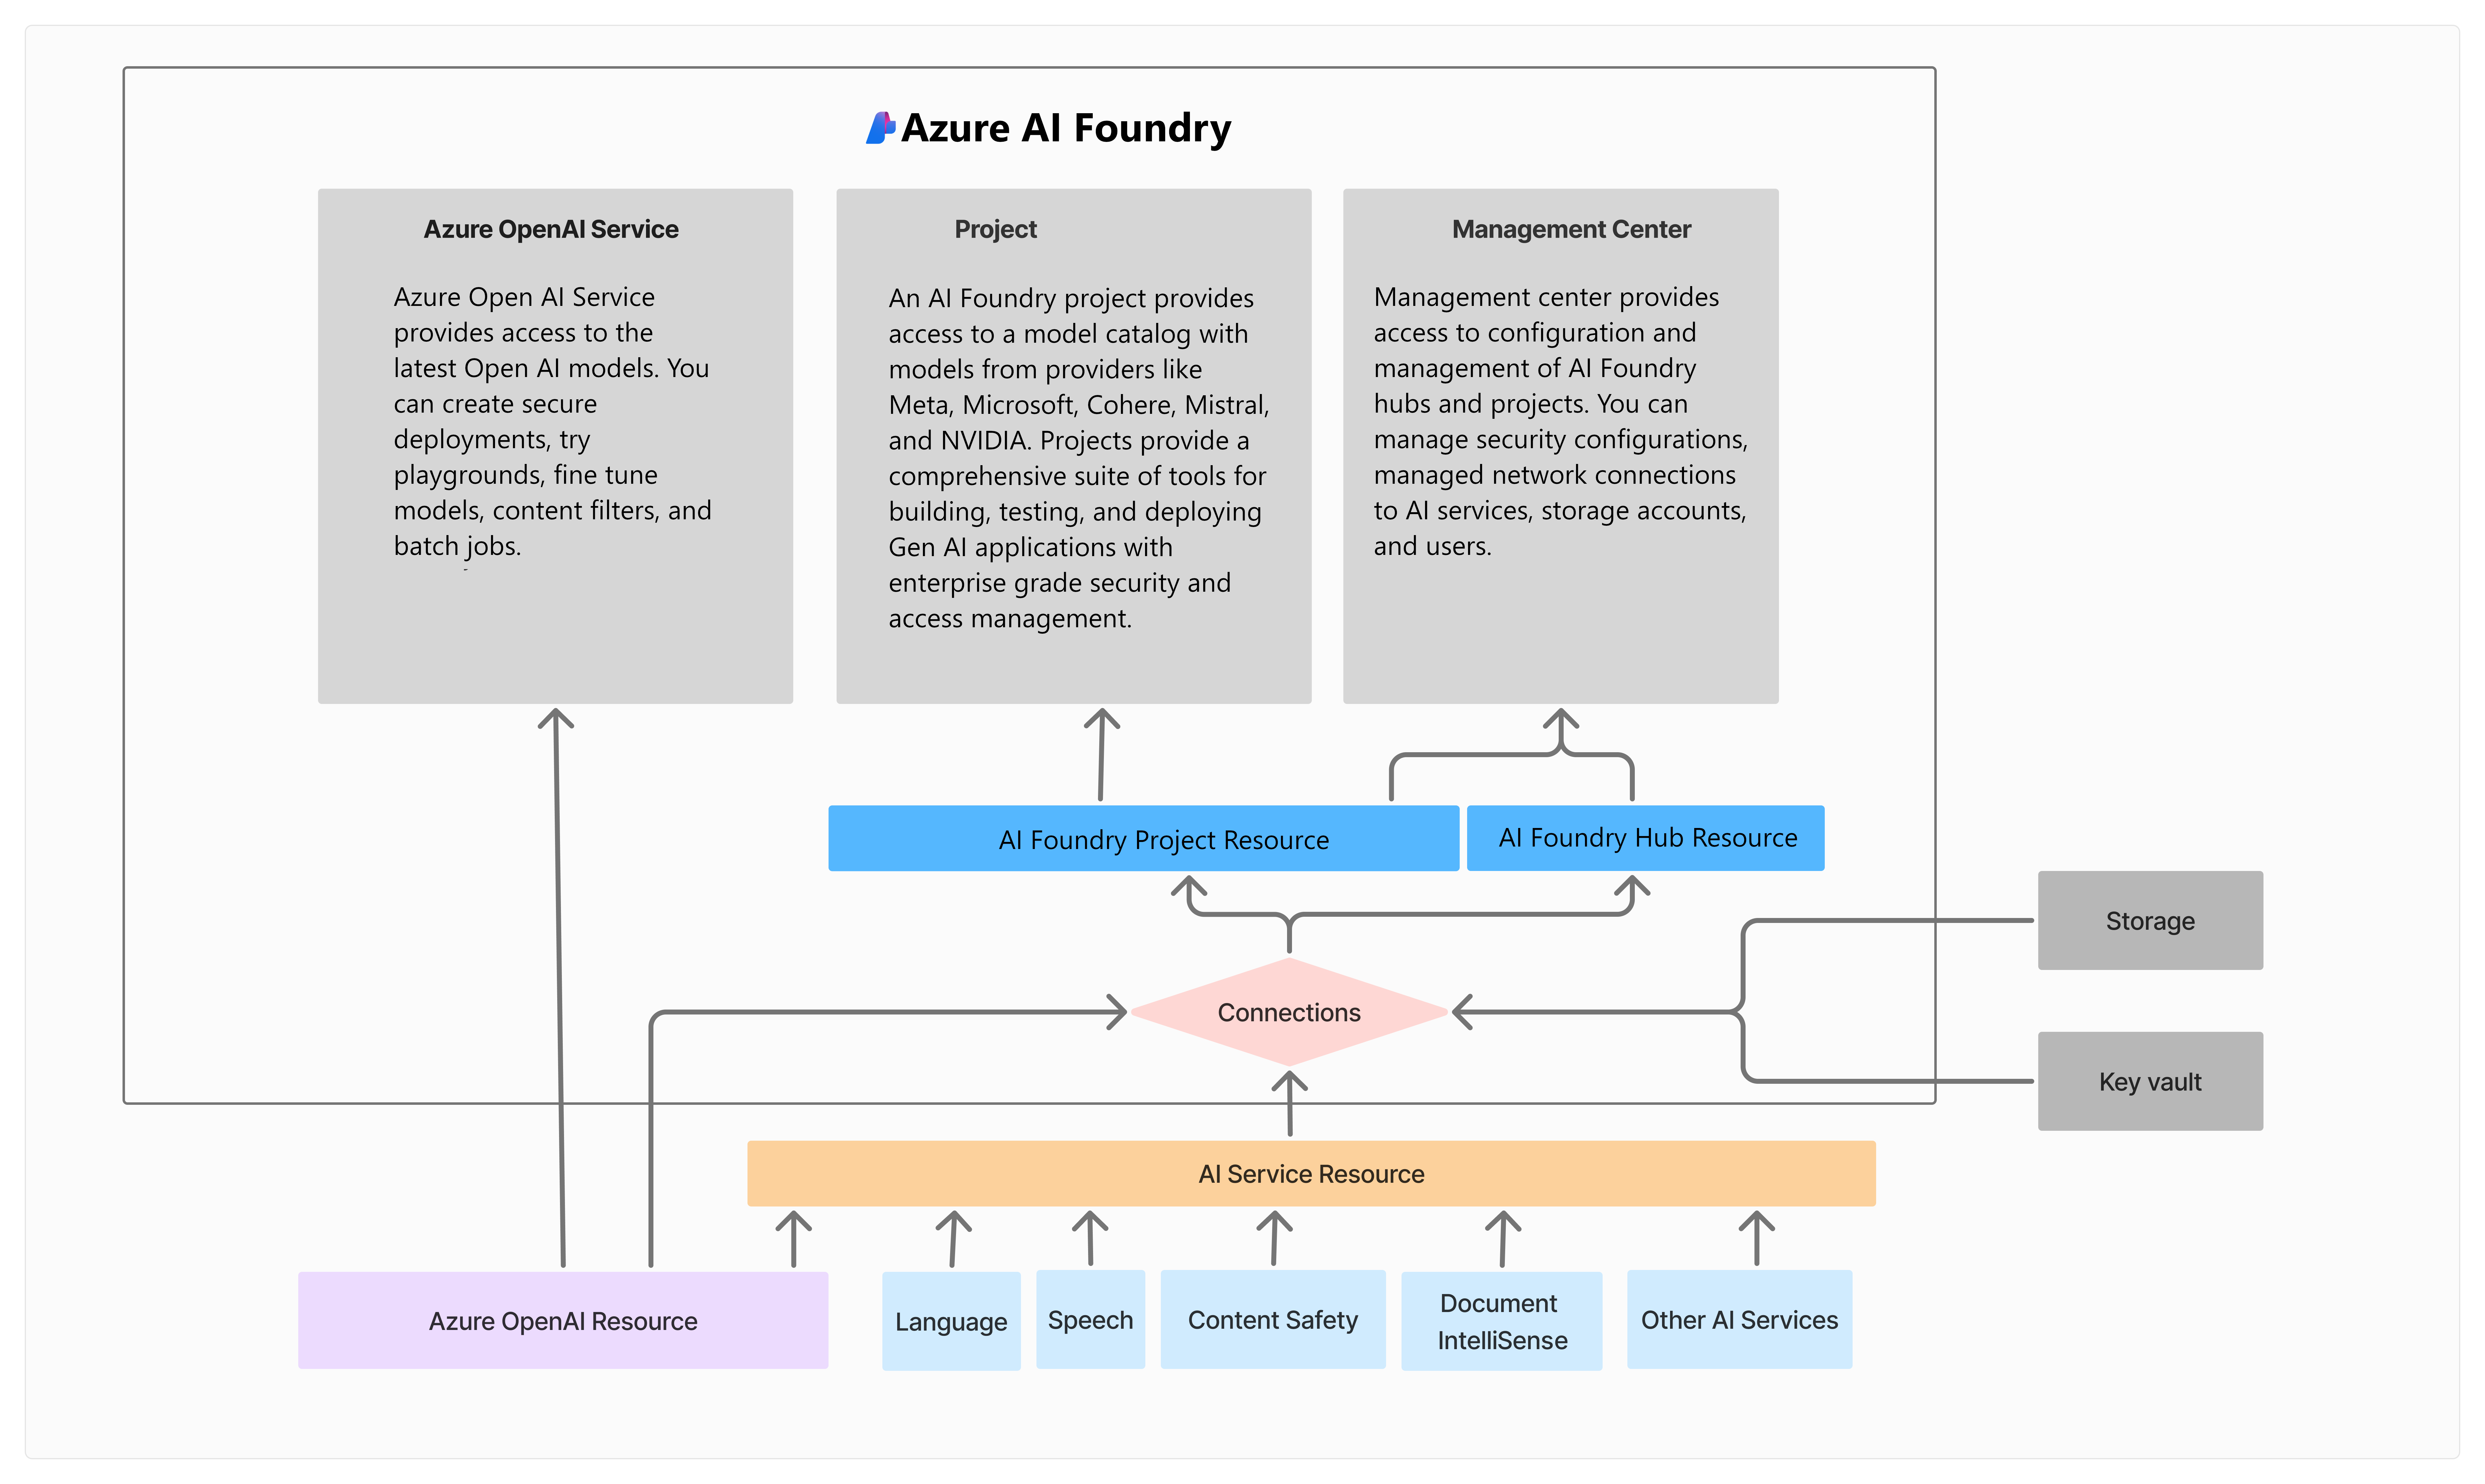
The Azure AI Foundry provides a unified experience for both AI developers and data scientists to build, evaluate, and deploy AI models through a web portal, SDK, or CLI. The Azure AI Foundry is built on capabilities and services provided by other Azure services.
The Azure AI Foundry Architecture (click to expand)
The figure below provides the big picture of the core components and capabilities provide to support end-to-end development of enterprise-grade generative AI solutions.

RAG Chat App Workshops
This repository contains the source and instructions guide for a workshop that takes you step-by-step through the process of building a RAG-based chat app using Azure AI Foundry.
The Guide has TWO Learning Paths - Pick one! 🆕
Pick the path that reflects your interest and experience level:
- The Hybrid Workshop is derived from the official 3-part tutorial and uses both the Azure AI Foundry Portal (for setup) and Azure AI Foundry Python SDK (for ideation & evaluation). This is a code-first experience.
- The Portal First Workshop focuses on using the Azure AI Foundry Portal to maximize the end-to-end development workflow without SDK. This is a low-code experience.
Pre-Requisites
To get the most from this lab, you will need the following:
- An Azure subscription - Get one for free
- A GitHub account - Get one for free
- Familiarity with VS Code, Github & Azure.
- Familiarity with Python and Jupyter Notebooks.
Verify: Your Azure subscription has sufficient quota to deploy these models:
- Chat:
gpt-4o-mini - Embeddings:
text-embedding-ada-002
Verify: Your Azure account is authorized to make role assignments for Azure AI resources. This may involve having a Privileged role like Owner, User Access Admin or RBAC Admin.
Getting Started
This repository is instrumented with a devcontainer.json to give you a development environment with all required dependencies pre-installed. To get started:
-
Fork the repository to your personal profile. Visit your fork in the browser.
-
Launch Codespaces on that fork. Setup will take a few minutes.
-
Type this command into the VS Code terminal when ready. A dialog will pop up.
1mkdocs serve -
Select the "View in browser" option in the pop-up dialog. You should see this guide.
-
Open a second VS Code terminal pane. Use that for all further instructions.